I have a sheet of gold glitter craft foam on my workbench today, and I’m turning it into a clean, geometric holiday pendant without spending twenty dollars at a decor boutique. Most store-bought ornaments are fragile glass or hollow plastic that shatters the moment it hits the floor. This project uses high-density EVA foam and thermal bonding to create a durable, lightweight star that keeps its shape for years.
Author: LifeKaki
⚡ Quick Guide: How to Make It in 8 Steps
- Draw a grid on the back of the glitter foam using a steel ruler.
- Cut the foam into equal strips with a sharp utility knife.
- Fold the strips into triangles and glue the seams.
- Press the facets together to establish the base structure.
- Create matching halves with identical geometric angles.
- Join the halves at the perimeter to form a 3D shape.
- Attach the hanging loop and central decorative beads.
- Check for structural stability and clean up loose glue threads.
📊 Technical Specifications & Materials
| Core Material | High-density EVA foam |
| Material Thickness | 2.0 mm |
| Adhesive Base | EVA hot-melt glue |
| Structural Geometry | 3D faceted star |
| Total Build Time | 35 minutes |
📊 Project Overview & Costs (USA Market)
🔧 Difficulty Level: Beginner
⏱️ Time Investment: 35-45 minutes
💡 Verdict: DIY assembly saves compared to boutique decor purchases.
Tools & Materials Used
• Glitter foam sheets
• Faux pearls
• Hanging cord
🔧
Steel straight edge ruler
AliExpress 🛒
🔧
Utility knife
AliExpress 🛒
🛠️
BUY ON ALIEXPRESS 🛒
Recommended
Hot glue gun
Step-by-Step Assembly & Testing
Measuring and Grid Marking the Foam Sheet
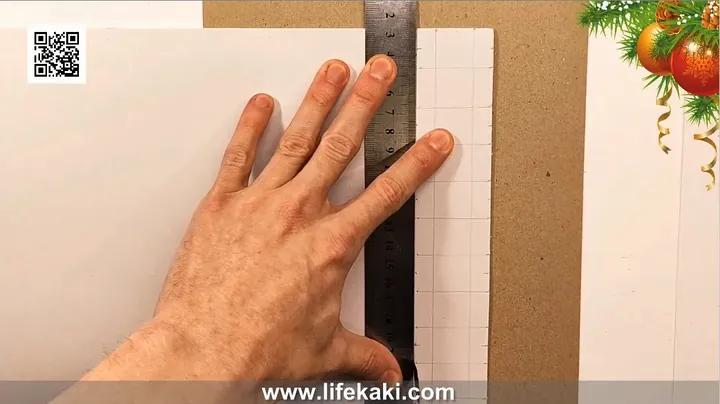
I lay the sheet face down on my mat to keep the glitter surface clear of pencil marks. A steel ruler is essential here; plastic ones slide too easily on the foam. I mark uniform intervals to ensure the strips remain perfectly parallel. If the layout is off, the finished medallion will look crooked. I use a light pencil touch to avoid cutting through the material. I check all dimensions before making the first cut. Accurate planning saves material. It works.
Slicing Geometric Strips Along the Grid
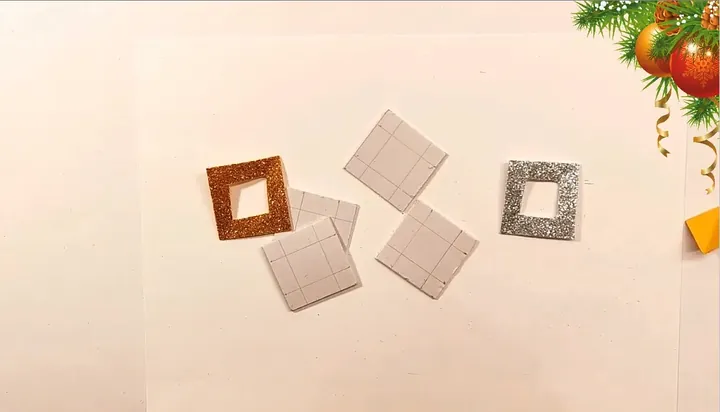
I snap a fresh blade into my knife to keep the edges clean. I pull the blade along the ruler in one steady motion. Rushing causes the foam to stretch and produces jagged edges. I apply firm pressure to the ruler to keep it from slipping. I let the sharp edge do the work without mashing the foam. I organize the strips by length immediately after cutting. Clean strips make the final assembly easier.
Creasing and Setting Geometric Folds
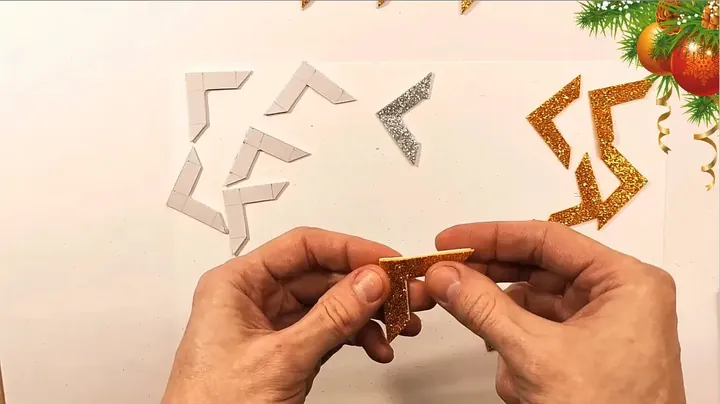
I pinch the foam to create sharp creases. I add a small drop of hot glue at the fold to lock the angle. I keep the glue volume low to avoid messing up the gold surface. I hold the joint for a few seconds until the glue cools. Alignment is key here. If the folds aren’t consistent, the ornament won’t form a circle. I pay attention to the geometry.
Thermal Bonding the Modular Facets
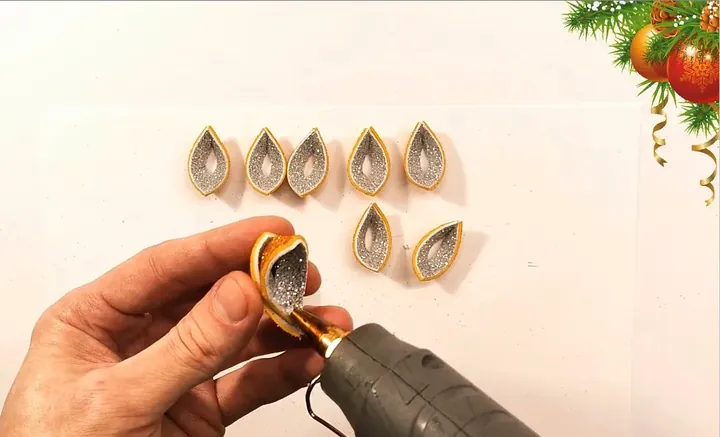
I use a clean glue nozzle to apply adhesive into the seams. I touch the tip to the fold and pull away to avoid burning the finish. I clamp the surfaces together until the glue sets. If I get excess glue, I wait until it’s hard before peeling it off. I keep the angles uniform so the pieces fit together well. It’s a simple process.
Reinforcing Symmetrical Cluster Points
I glue the sub-assemblies together along their spines. I press the joints until they hold. I watch the symmetry so the star shape remains balanced. I avoid rushing, as the foam can warp if the glue is still warm. I check the alignment against my bench. It’s flat.
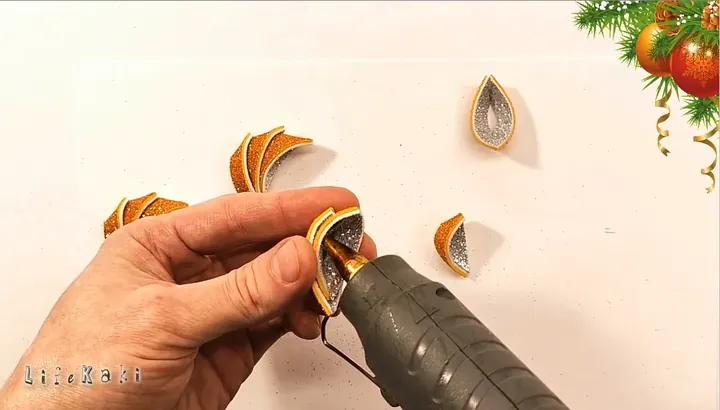
Assembling the Circular Medallion Perimeter
I join the clusters to form a circle. I work my way around, gluing each section carefully. The structure gains stiffness as the loop closes. I warm the foam slightly if I need to stretch it for a perfect fit. I clean up any glue strings once finished. The form is now locked.
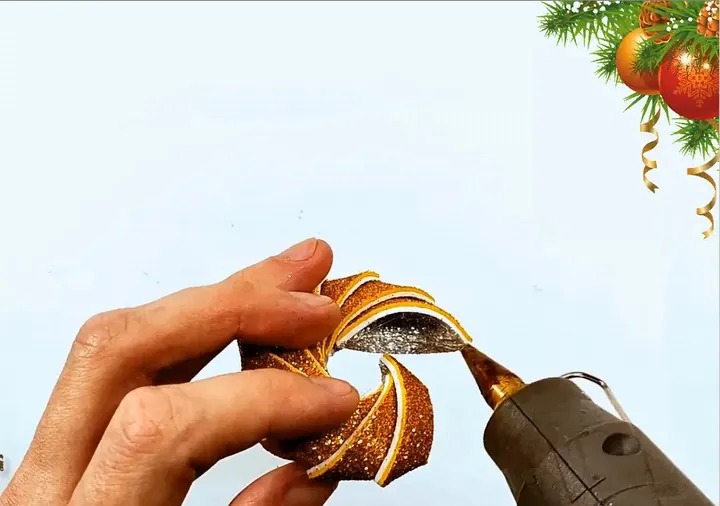
Installing Core Accents and Suspension Cord
I thread the cord through the top seam and secure the knot with glue. I glue a pearl bead to the center of each face. This covers the junction and adds a polished look. I hold the bead in place until the glue holds. The result is clean and centered.
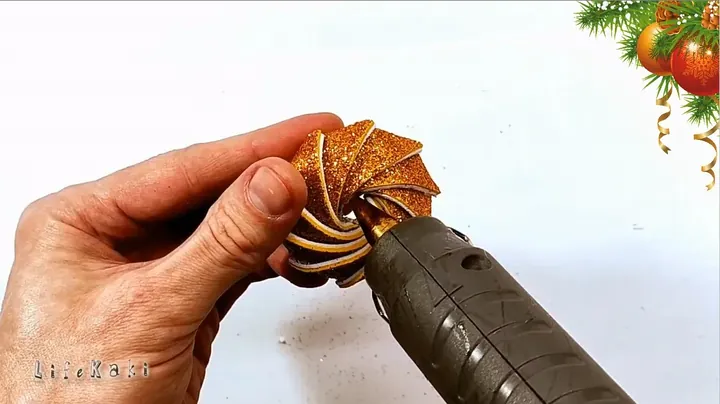
Final Dimensional Verification and Display
I measure the diameter to ensure it’s balanced. The ornament sits flat and holds its shape. It’s lightweight and won’t weigh down tree branches. I check for any stray glue bits and clear them away. It looks professional.
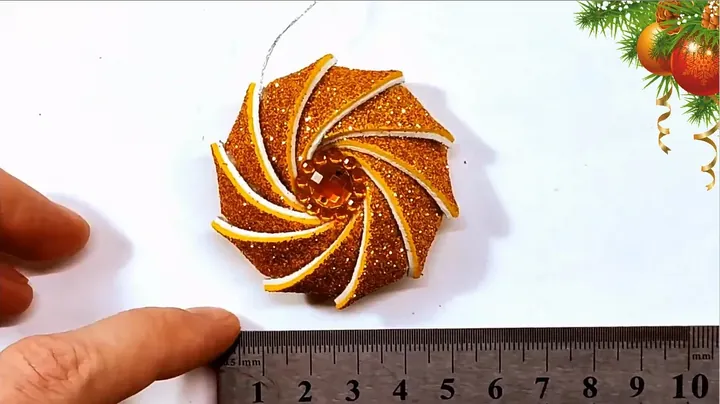
⚠️ CAUTION: SAFETY WARNING!
Hot glue reaches temperatures up to 380°F. Avoid skin contact. Use a heat-resistant surface.
Summary & Tips
You don’t need expensive kits to make ornaments. Glitter foam and a hot glue gun provide a shatterproof result for a fraction of the cost. I suggest making several in different sizes.
📋 FAQ
❓ Can I use standard school glue?
No. School glue takes too long to dry and will not bond properly to foam. Hot glue provides an instant bond.
❓ Will the glitter fall off?
Quality glitter foam is heat-pressed and minimal shedding occurs during the cutting phase.
❓ Can I make these larger?
Yes. Adjust the grid measurements proportionally to increase the size while maintaining the same geometry.
Disclaimer: Tools purchased independently. This post contains affiliate links for which a small commission may be earned.





Leave a Reply