Are you looking to inject some much-needed vigor into a slow-moving laptop? Upgrading an laptop with a solid-state drive (SSD) stands out as one of the most effective methods to drastically improve its speed and overall system responsiveness. about experiencing significantly quicker boot times, applications loading in a flash, and an overall snappier computing experience. I’ll walk you through the entire procedure of swapping out an outdated hard disk drive (HDD) for a high-performance SSD, specifically an HP S650 model. You’ll observe precisely how to open the laptop’s chassis, extract the old spinning disk, install the new solid-state drive, and then reassemble everything, ensuring it’s ready for peak operation.
Author: LifeKaki
⚡ Quick Guide: How to Make It in 5-10 Steps
- Remove all screws from the laptop’s back cover. Maintain organization.
- Gently open the laptop case. Access internal components.
- Locate and disconnect the 160GB hard drive and attached cables.
- Unscrew and remove the metal mounting bracket from the old HDD.
- Mount the metal bracket onto the 240GB HP S650 SSD.
- Connect the SSD to the motherboard. Secure it in the laptop chassis.
- Ensure all internal components, including the Wi-Fi card, are reconnected.
- Align and snap the back panel into place. Reinsert all screws.
- Tighten all fasteners. Prevent rattling or movement.
- Power on the laptop. Enter BIOS to confirm SSD recognition.
📋 In This Article
- Technical Specifications
- Tools & Materials — what you need
- Removing the Back Cover Screws
- Locating and Disconnecting the Hard Drive
- Installing the Mounting Bracket onto the New SSD
- Placing the SSD into the Slot and Verifying Connections
- Final Screw Tightening and Pre-Boot Check
- Final Check and BIOS Confirmation
📊 Technical Specifications & Components
| Original Hard Drive Size | 160GB |
| New Solid State Drive (SSD) Size | 240GB |
| SSD Model | HP S650 SATA SSD |
| Laptop Model | MSI (specific model not specified in video, but general type is a standard laptop) |
| Storage Interface | SATA |
📊 Project Overview
Difficulty Level: Medium
Time Investment: DIY: 45-60 minutes | Pro: 15-20 minutes
Verdict:Performing this MSI laptop SSD upgrade yourself generates in labor savings. This amount is sufficient for a quality screwdriver set or a portion of a new SSD purchase.
Tools & Materials Used
• HP S650 SATA SSD (new drive)
• MSI Laptop (for upgrade)
🛠️
BUY ON ALIEXPRESS 🛒
Recommended
Screwdriver Set For Gadgets
Step-by-Step Assembly & Testing
Removing the Back Cover Screws
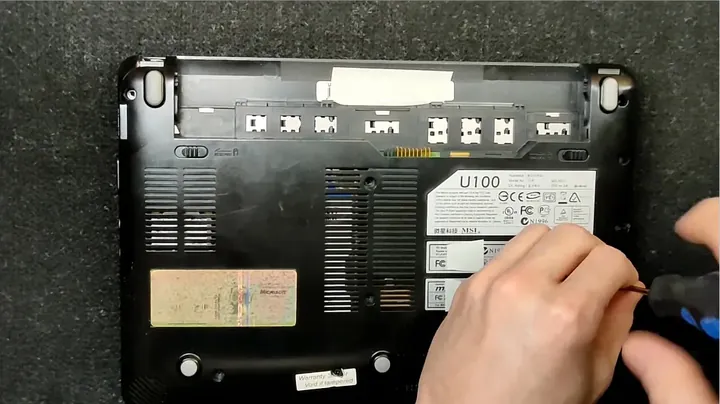
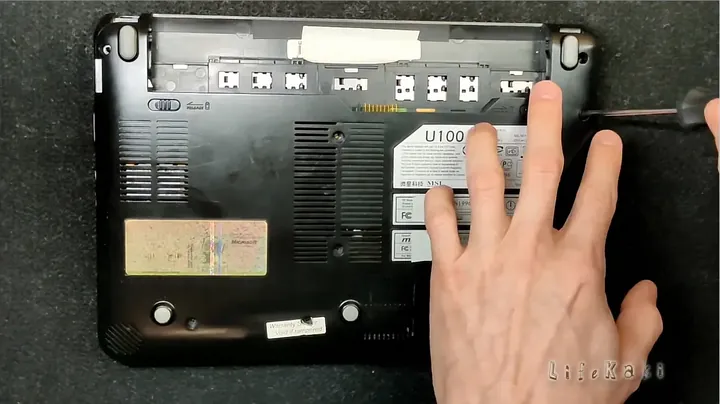
First things first, I’m starting this MSI laptop SSD upgrade by getting all the screws out of the back panel. It’s crucial to keep your workspace tidy here; I usually lay them out in the pattern they came out to make reassembly a breeze. You don’t want to mix up screw lengths or forget one when you’re buttoning things back up. I’m carefully peeling back any warranty stickers that might be covering screw holes, as those often hide fasteners. Missing a screw can make prying the case open a real pain, and you might even crack the plastic. Take your time with each fastener, making sure the screwdriver bites properly to avoid stripping the heads. A stripped screw is a headache you definitely don’t need when upgrading your storage.
Opening the Laptop Case
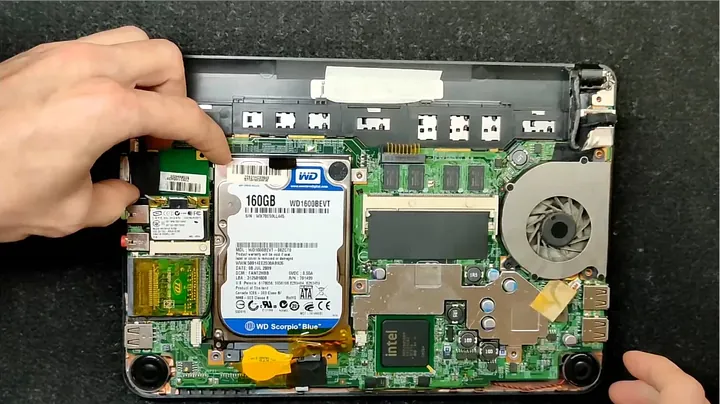
With all the screws out, it’s time to carefully pry open the laptop’s back casing. I like to start from a corner or an edge where there’s a slight gap, using a plastic pry tool to avoid scratching the finish. You’ll hear some satisfying little ‘pops’ as the plastic clips release; that’s normal. Don’t force it too much, though; if it feels stuck, double-check for any missed screws, especially under those rubber feet or stickers. Once it’s loose, I gently lift the panel away to expose the internal hard drive bay. It’s wild how much is packed into these thin machines, isn’t it? Getting that panel off cleanly is key to avoiding any cosmetic damage or breaking fragile plastic tabs.
Locating and Disconnecting the Hard Drive
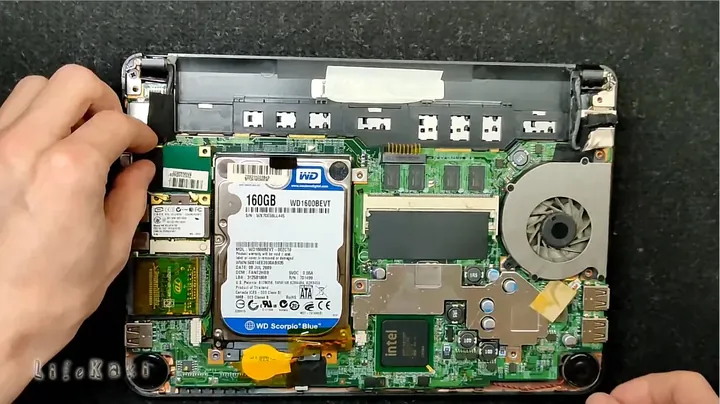
Now that the guts are exposed, my next move is to pinpoint the old hard drive. On this MSI laptop, it’s pretty clear, sitting in its mounting bay. Before I even touch it, I’m being mindful of static electricity; a quick touch to a metal part of the chassis usually discharges any static buildup. I’m also spotting the Wi-Fi card nearby, and it looks like I need to carefully detach it from the laptop’s side to get proper access to the drive. Sometimes these internal components are a bit fiddly, so gentle handling is key. I’m removing the entire hard drive assembly while it’s still in its protective metal bracket, which simplifies the next step of separating the drive itself. It’s all about making sure I don’t yank any delicate ribbon cables by mistake.
Separating the Old Hard Drive from its Bracket
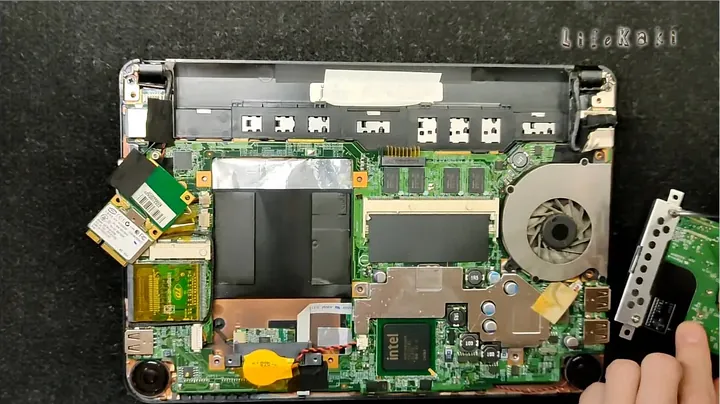
The old 160GB hard drive is out of the laptop chassis, still cradled in its metal bracket. Now, I need to separate the two. I’m unscrewing the small fasteners that secure the metal bracket to the sides of the drive itself. These screws are usually tiny, so a good magnetic-tip screwdriver really helps prevent losing them. This bracket isn’t just for mounting; it often provides a bit of shock absorption and ensures the drive sits snugly in its bay. Once those screws are out, the old hard drive just slides right out. With that old spinner out of the way, I’m prepping my new 240GB HP SSD for installation. It’s a satisfying feeling to swap out ancient tech for something much faster.
Installing the Mounting Bracket onto the New SSD
with the old hard drive out, I’m taking that same metal mounting bracket and carefully aligning it with my new 240GB HP S650 solid-state drive. The screw holes should line up perfectly. This part is pretty straightforward, but you want to make sure the bracket is flush and seated correctly. I’m tightening the screws firmly now to secure the bracket to the SSD. You don’t need to overtighten them and risk stripping the threads, but they need to be snug enough so the SSD won’t wobble around inside the laptop. A loose drive could lead to connection issues down the line. After that, the new SSD, now with its bracket, is ready to be inserted into the laptop’s hard drive bay.
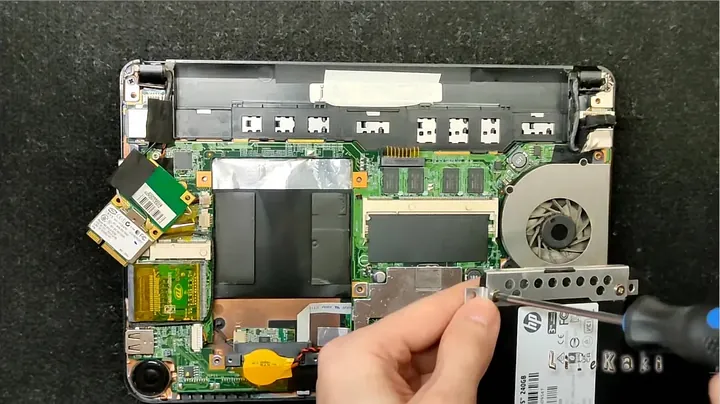
Connecting the SSD to the Motherboard
With the bracket secured to the new HP S650 SSD, I’m carefully sliding the entire assembly into the laptop chassis. It needs to sit perfectly in the hard drive bay. Once it’s in place, I’m securing the SSD with the mounting screws that hold it firmly to the chassis. You don’t want any movement in there. These screws are critical for keeping the drive stable, especially if the laptop gets bumped around. While I’m in there, I’m also reconnecting the Wi-Fi card to its original internal slot. It’s easy to forget these smaller connections, but they’re vital for the laptop’s full functionality. Double-checking all connections before moving on saves a lot of headaches later. Everything feels solid now.
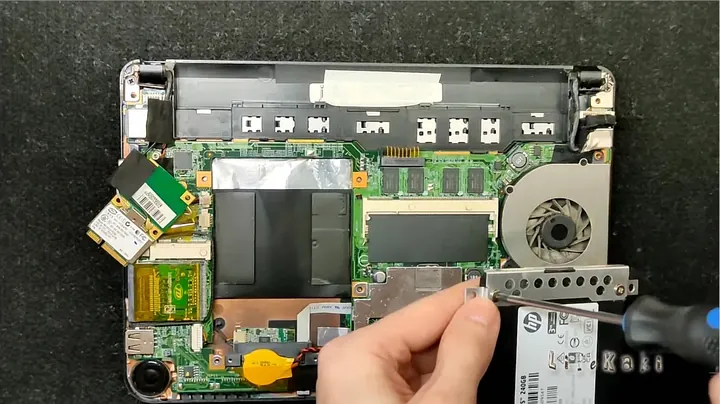
Placing the SSD into the Slot and Verifying Connections
Now that the SSD is physically mounted, I’m taking a moment to ensure the drive’s circuit board is seated firmly next to the drive itself, making proper contact with the SATA connector. Sometimes, these connectors can be a bit tricky to line up, so I’m giving it a gentle but firm push until it feels fully engaged. A loose connection here means the laptop won’t recognize the new drive, and you’ll be scratching your head. With the internals looking good, I’m moving on to align the laptop’s back panel with the chassis edges. It needs to sit perfectly flush before I attempt to close it up. This alignment prevents any gaps or uneven pressure points when the case is reassembled.
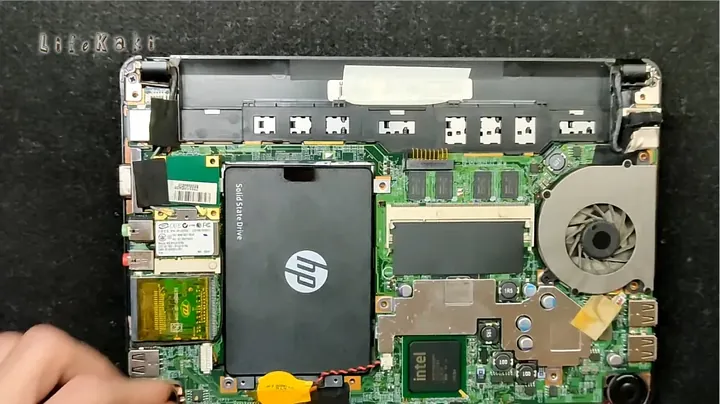
Closing the Case and Securing Screws
With everything connected and aligned, it’s time to close up the laptop. I’m carefully pressing down on the corners and edges of the back panel to snap it back into place. You should hear those satisfying clicks as the plastic clips re-engage. I’m verifying that the panel is perfectly flush with the laptop’s base all around; no gaps, no bumps. If it’s not sitting right, don’t force it; something might be misaligned inside, or a cable could be pinched. Once I’m confident it’s closed properly, I start reinserting all the screws into the back panel of the laptop. This is where that organized screw layout really pays off. It’s starting to look like a laptop again.
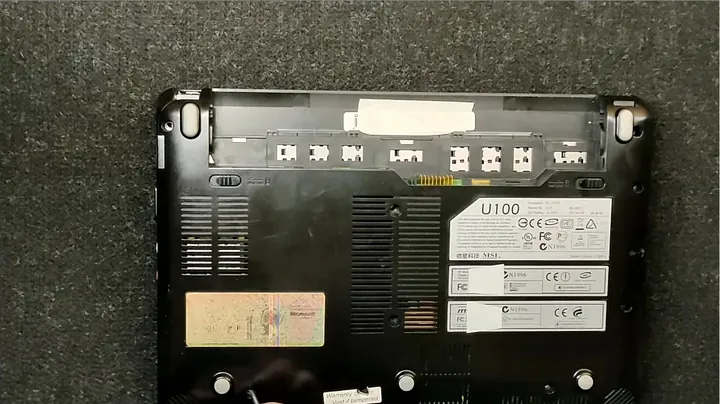
Final Screw Tightening and Pre-Boot Check
As I’m putting the final touches on this MSI laptop SSD upgrade, I’m going around and tightening all the screws to ensure the back panel remains completely secure. I’m not cranking them down, just snug enough so there’s no play. You don’t want a loose panel rattling around or potentially popping open. A quick visual inspection confirms all fasteners are tight and none are missing before I even think about powering on the device. Once I’m satisfied the physical build is complete, I’m opening the laptop lid to access the keyboard and screen. This final external check is important; it’s the last chance to catch any physical issues before firing it up. Everything looks good, ready for power.
Final Check and BIOS Confirmation
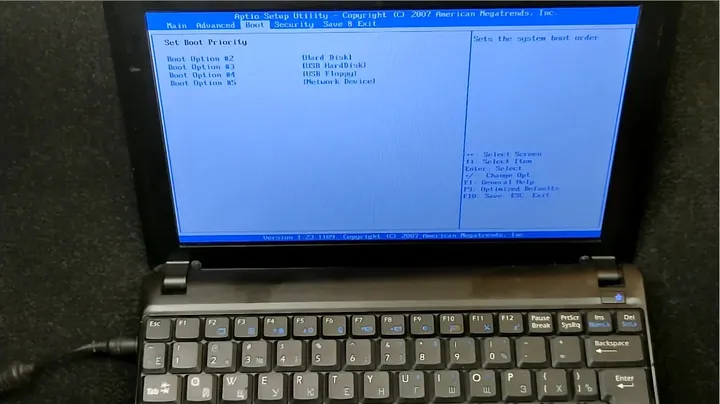
The moment of truth. I’m powering on the laptop now and immediately hitting the key (usually F2, F10, or DEL for MSI) to enter the BIOS menu settings. This is where I’ll confirm that the new 240GB HP S650 SSD is recognized by the system. If it shows up in the storage devices list, we’re golden. If not, it means I’d need to go back and check connections. It’s a huge relief when you see that new drive listed. Once confirmed, I can exit BIOS and proceed with operating system installation or cloning. This upgrade isn’t just about speed; it’s about giving an older machine a whole new lease on life. This MSI laptop is now ready to fly, booting much faster and running applications smoothly. What a difference a solid-state drive makes!
⚠️ CAUTION: SAFETY WARNING!
Always disconnect the laptop battery before performing any internal work to prevent accidental short circuits or damage to components. Be mindful of static electricity and work on a clean, organized surface.
Summary & Tips
Bottom line: Swapping out an old HDD for an SSD like the HP S650 is probably the best bang-for-your-buck upgrade you can do for an aging laptop. It’s not a complex job, but it demands patience and careful handling of small components. You’ll get vastly improved performance without breaking the bank on a whole new machine.
📋 FAQ
Do I need to reinstall Windows after an SSD upgrade?
Yes, typically. A fresh Windows installation on the new SSD or cloning the existing HDD to the SSD is required. Cloning offers time savings, but a fresh installation usually provides a cleaner system.
Can I use my old HDD externally after upgrading to an SSD?
Certainly. Acquire an affordable 2.5-inch external HDD enclosure. Insert the old 160GB drive, and it becomes a useful external backup or additional storage device.
What’s the main difference in performance I’ll see with an SSD?
The performance difference is substantial. Users will observe significantly reduced boot times, applications launching much faster, and a drastic improvement in overall system responsiveness. Hard disk drives are inherently slower compared to solid-state drives, particularly for the operating system’s primary storage.
Disclaimer: I purchased all tools for this guide with my own money to ensure an unbiased review. This post contains affiliate links, meaning I earn a small commission if you make a purchase at no extra cost to you.




Leave a Reply