This DIY guide isn’t just about fixing; it’s about giving that tired fixture a fresh lease on life with a clean new paint job and solid electrical work. We’re tearing it down, prepping it, painting it up, and then putting it all back together with fresh wiring, ensuring it’s safe and functional once more. You can do this at home, saving yourself some cash and ending up with a custom piece.
Author: LifeKaki
⚡ Quick Guide: How to Make It in 10 Steps
- Disassemble the lamp, removing the head and internal components.
- Prepare the base by drilling a larger hole for the new button.
- Apply masking tape to create your desired paint pattern.
- Spray paint all lamp components with thin, even coats of green paint.
- Carefully peel off the masking tape to reveal the clean lines.
- Strip the insulation from the new electrical wires for connections.
- Reassemble the flexible neck and head, carefully routing the wires through.
- Connect the main power cord wires using reliable crimped connectors.
- Install a cable tie for strain relief and secure the base plate.
- Perform a final assembly check and test the lamp’s full functionality.
📋 In This Article
- Technical Specifications
- Tools & Materials — what you need
- Disassembling Lamp Components
- Preparing Base Hole and Initial Taping
- Peeling Tape and Stripping Wires
- Stripping Wires and Reassembling Neck
- Connecting Flexible Neck to Lamp Head
- Inserting Power Cord and Initial Wire Connections
- Installing Cable Strain Relief
- Final Assembly Check and Functional Test
📊 Technical Specifications & Components
| Lamp Components | Table lamp (base, head, flexible neck) |
| Paint Type | Green spray paint |
| Adhesive | Masking tape |
| Electrical | Electrical wire, connectors, cable ties |
| Protection | Protective plastic discs |
📊 Project Overview
Difficulty Level: Medium
Time Investment: DIY: 3-5 hours (including paint drying time) | Pro: 1.5-2.5 hours
Tools & Materials Used
• Precision Screwdriver Set
• Electric Mini Drill
• Pliers
• Wire Strippers
• Side Cutters
🔧
Power Electric Mini Drill
AliExpress 🛒
🛠️
BUY ON ALIEXPRESS 🛒
Recommended
Multi Function Disassembly Set
Step-by-Step Assembly & Testing
Disassembling Lamp Components
I’m kicking things off by laying out all the disassembled lamp parts on my workbench; gotta keep everything organized to avoid losing tiny screws. It’s a table lamp, so I’ve got the base, the head, and that flexible neck. My first move is to carefully detach that flexible neck from the lamp head. I’m grabbing a screwdriver to loosen the mounting screws. You don’t want to strip these, so apply steady, firm pressure. I’m unscrewing them until the head comes completely free. All the small hardware? Straight into a little container; it’s easy to lose these bits, and I don’t want to be hunting for them later. This initial inspection helps me get a feel for the lamp’s construction and what I’m dealing with before the real work starts.
Exposing Wiring and Extracting Components
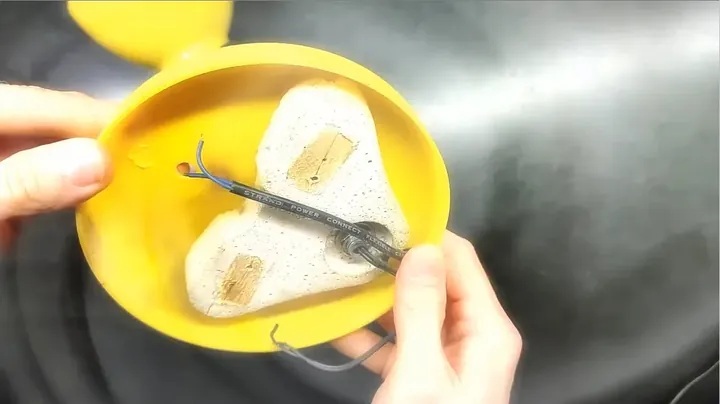
With the lamp head off, I can now see all the internal electrical wiring. It’s pretty straightforward, but you still need to be careful. My next job is to pull out that internal white cylindrical component. I’m using a pair of pliers for this; sometimes these things are seated pretty tight, so a gentle but firm tug does the trick. After that, I’m carefully extracting the concrete weight from the lamp housing. This weight gives the lamp stability, and I don’t want to chip it. It’s a bit awkward, but it’ll come out. Make sure the flexible neck is completely separated from the head now; we’re breaking it down to its core elements.
Preparing Base Hole and Initial Taping
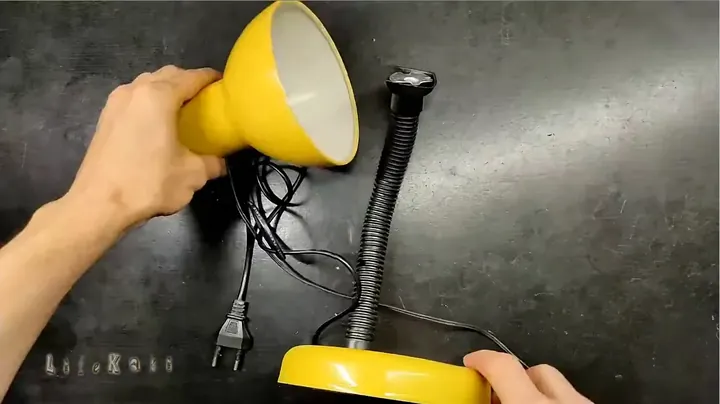
I’ve got that concrete weight out now, and I’m giving it a quick once-over for any cracks or damage. It looks solid, which is good. Next up, I’m getting a small white button ready for the lamp base. This button looks like it’ll be a nice touch. To get it installed right, I need to enlarge the existing hole in the base. I’m reaching for my step drill bit; it makes clean, precise cuts through metal or plastic. Applying steady, even pressure here is key to avoid any jagged edges or deforming the base. Once the hole’s the right size, I’m pressing that white button firmly into place. It should sit flush, nice and tight. Right after that, I’m starting to apply yellow masking tape strips across the base surface.
Masking for Paint and First Coat Application
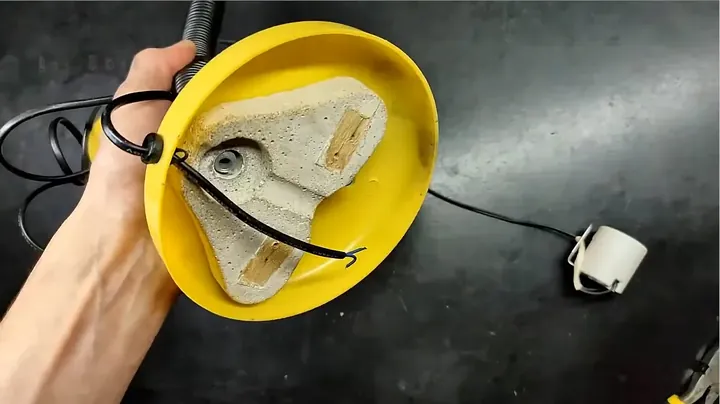
Now it’s time to get creative with the paint job. I’m laying down strips of yellow masking tape across the base surface. The idea here is to create a consistent, eye-catching pattern for the upcoming paint application. I’m going for a crisscross pattern, applying it to both the base and the lamp head. This isn’t just random; I’m making sure all the tape edges are pressed down securely. Any loose edges mean paint bleed, and I don’t want fuzzy lines on my fresh finish. Before I even think about spraying, I’m double-checking that the tape pattern is perfectly symmetrical. It’s gotta look sharp. Then, I’m placing all parts on a flat, protected painting surface. Time for that thin, even coat of green spray paint. I’m making sure to allow each coat to dry completely between light coats.
Peeling Tape and Stripping Wires
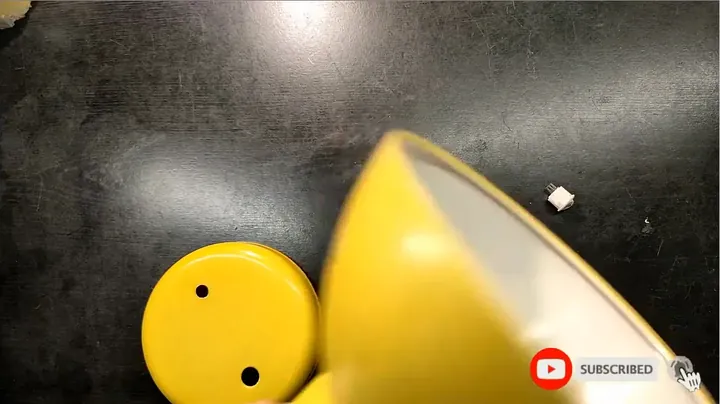
The paint’s dry, and now comes the satisfying part: peeling away the masking tape to reveal those crisp patterns. I’m doing this carefully, pulling the tape away slowly. This ensures I get clean, sharp paint lines without lifting any of the fresh green paint. I’m keeping a close eye out for any paint bleed under the tape edges; sometimes it happens, but slow removal minimizes it. I’m continuing this gentle process, removing all the tape from the lamp head assembly. Once all the tape is off, I’m grabbing my wire strippers to expose the electrical wire ends. I only need to strip enough insulation to make a solid, secure connection, nothing more.
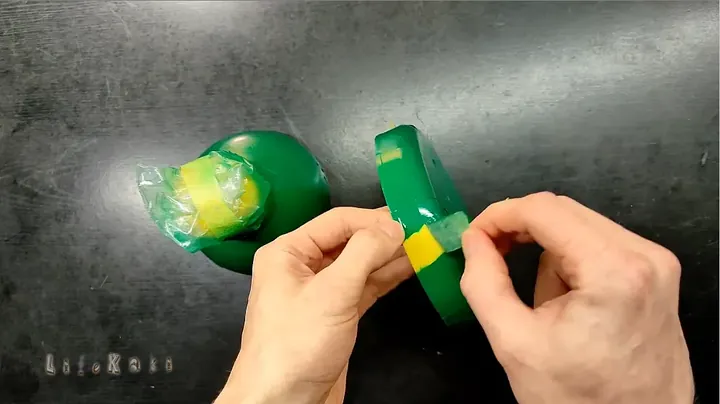
Revealing Patterns and Wire Prep
With the paint dry, I’m carefully peeling away the masking tape to reveal those clean, sharp patterns. This is where you see the design come to life. I’m pulling slowly to prevent any paint from lifting or lines from bleeding. It’s a delicate process, ensuring those crisp edges hold up. I’m checking for any tiny spots where paint might’ve seeped under, though careful application usually prevents that. After the tape is gone from all the lamp components, I’m switching gears to the electrical work. I’m grabbing my wire strippers to expose the ends of the new electrical wire. Only strip enough insulation to make a solid, secure connection; too much bare wire is just asking for trouble.
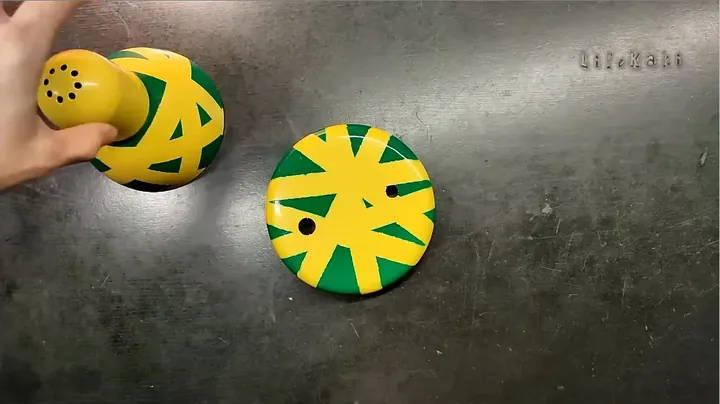
Stripping Wires and Reassembling Neck
After the paint job, the next critical step is getting those electrical wires ready. I’m using my wire strippers to expose the bare copper ends. You gotta be precise here; I’m stripping just enough insulation to make a solid, reliable electrical connection. Too much bare wire is a safety hazard, and too little won’t give you a good contact. The goal is to see about 1/2 to 3/4 of an inch of clean copper. This is where the circuit begins its life. I’m making sure not to nick the copper strands themselves. A clean strip is a good strip. Then, I’m reattaching the internal components to the lamp head. I’m securing all screws tightly to prevent future rattling. Next, I’m inserting the metal mounting piece into the corrugated tube and tightening the internal screw to lock the neck position. Finally, I’m threading the electrical wire through the flexible neck interior.
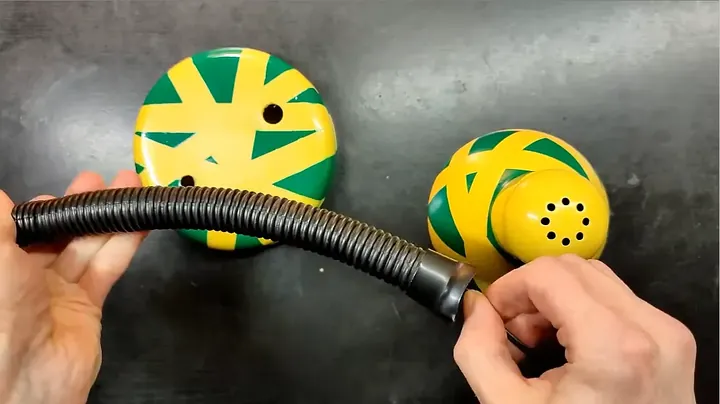
Assembling Neck, Head, and Routing Wires
Now it’s crucial to ensure that the wire isn’t pinched during the entire assembly process. A damaged wire can cause all sorts of headaches later on. I’m connecting the flexible neck to the lamp head assembly, taking my time to align the mounting holes perfectly before I even think about inserting any screws. Once those holes are lined up, I’m pushing the neck fully into the lamp head housing until it seats properly. I’m securing that connection with the provided metal screws, giving them a good snug turn. Then, I’m verifying the bulb socket is properly seated inside. Attaching the black cap to the neck end securely is next. I’m carefully threading the wire through the metal ring, then passing it through the concrete weight center. Finally, I’m using pliers to pull the wire through the base, making sure the wire isn’t damaged by any metal edges.
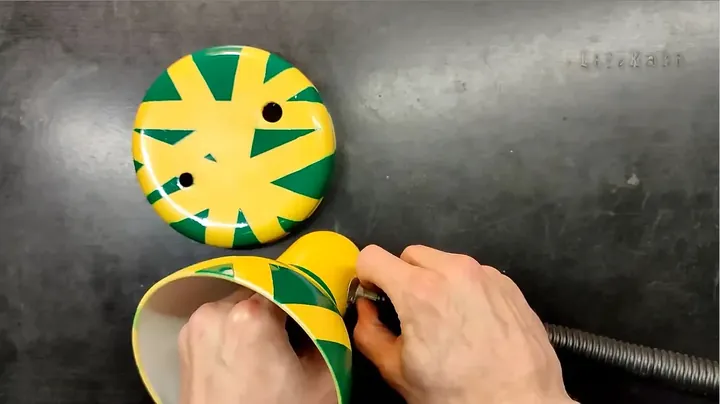
Connecting Flexible Neck to Lamp Head
With the wire threaded, it’s time to connect the flexible neck to the lamp head assembly. This step requires a bit of finesse. I’m making sure all the mounting holes align perfectly before I attempt to insert any screws. You don’t want to force anything here; if it doesn’t line up, something’s off. Pushing the neck fully into the lamp head housing is key for a secure fit. I’m giving it a firm push until it’s seated all the way. This connection needs to be solid because it’s going to bear the weight and movement of the lamp head. A wobbly connection here just won’t cut it.
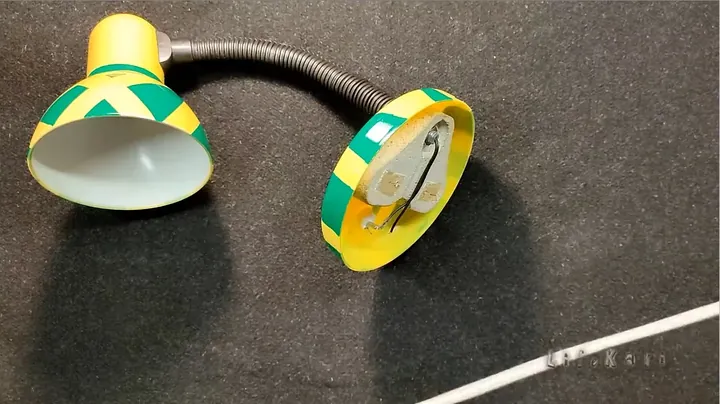
Securing Head, Socket, and Final Wire Routing
Now that the neck is seated, I’m securing that connection with the provided metal screws. A few turns, not too tight, just snug. Then, I’m verifying that the bulb socket is properly seated inside the lamp head; it’s got to be straight and firm for the bulb to screw in correctly. Next, I’m attaching the black cap to the neck end securely. This cap often acts as a strain relief or just a cosmetic cover. I’m threading the wire through the metal ring carefully, then passing it through the concrete weight center. Finally, I’m using pliers to pull the wire through the base. It’s critical to ensure the wire isn’t damaged by any metal edges along the way. That’s a potential short waiting to happen.
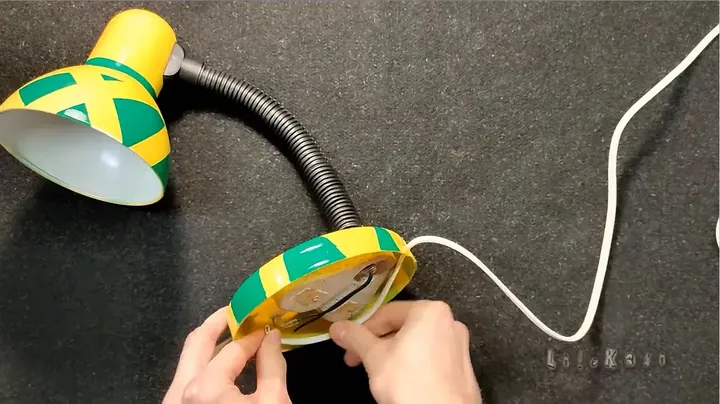
Inserting Power Cord and Initial Wire Connections
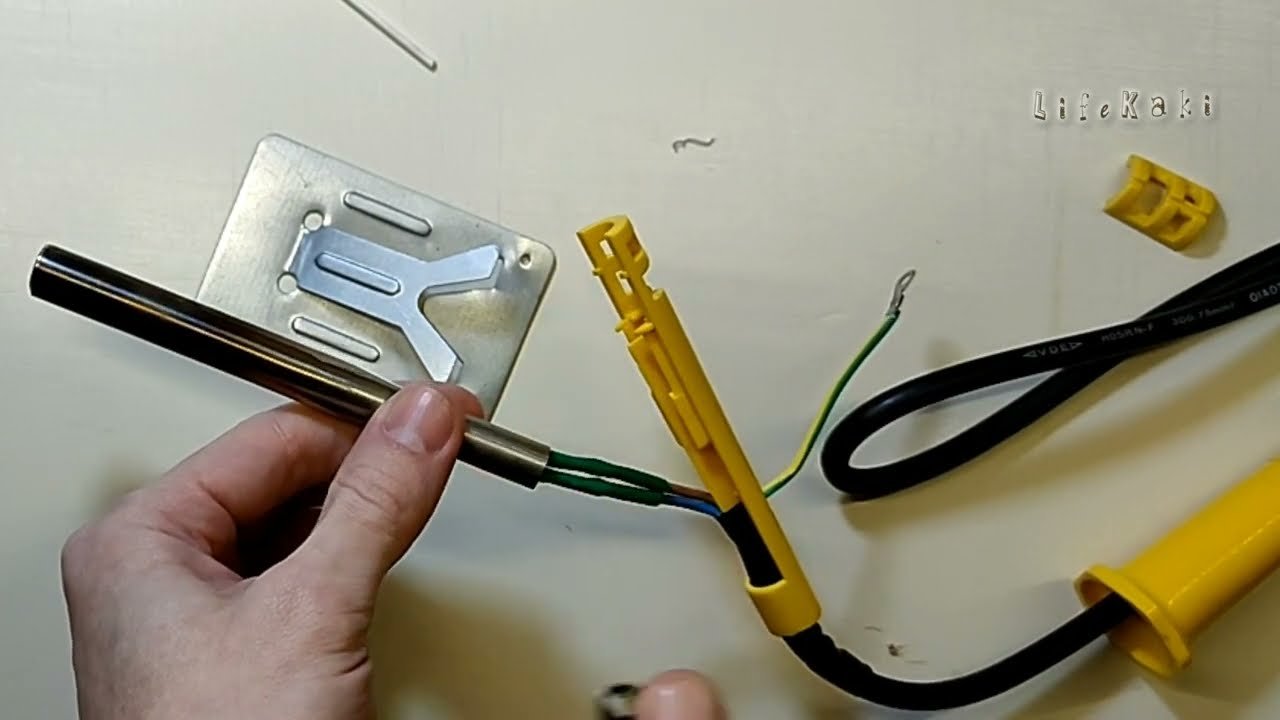
Now I’m bringing the main power cord into the lamp base. This is where everything gets tied together electrically. I’m preparing both the brown and blue wires for their connections. It’s important to keep track of which wire is which for proper polarity. My first connection is linking the brown wire from the power cord to the internal black wire of the lamp. I’m using a reliable connector for all these electrical junctions. You want these connections to be tight and properly insulated to prevent any shorts or hazards. A good connection means a safe lamp.
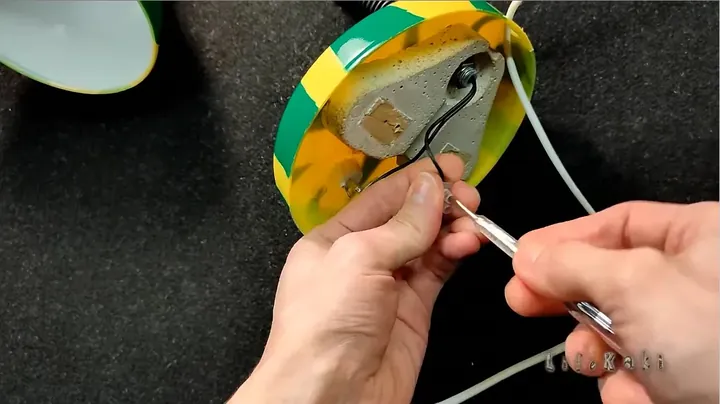
Crimping Connectors and Organizing Wiring
With the first connection made, I’m ensuring I use reliable connectors for all electrical junctions, no exceptions. It’s vital that all connections are tight and properly insulated; bare wires are a no-go. I’m crimping the connector firmly onto the wire ends. You can feel it bite into the metal. Next, I’m connecting the blue wire to the white connector block. This block helps keep things organized and secure. Once all the connections are made, I’m tucking the wires neatly inside the lamp base cavity. This isn’t just for aesthetics; it avoids overcrowding the wires against any sharp edges, which could chafe the insulation over time. Tidy wiring makes for a safer and easier-to-maintain lamp.
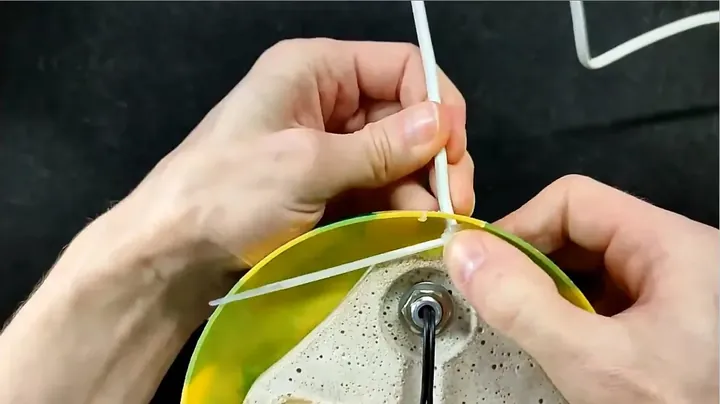
Installing Cable Strain Relief
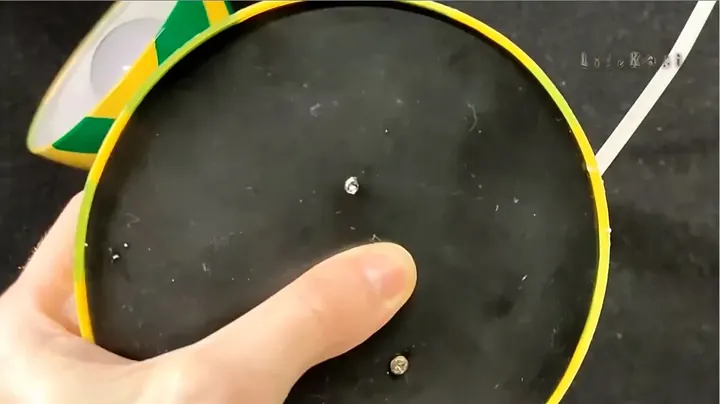
I’ve made sure to avoid overcrowding the wires against any sharp edges inside the base; that’s a common rookie mistake that leads to problems. Now, I’m threading a cable tie through a specific hole in the lamp base. This little tie is important; it secures the main power cord, providing crucial strain relief. Without it, any tug on the cord could pull the internal connections loose, which is a real fire hazard. I’m tightening the tie firmly around the cord. Once it’s snug, I’m trimming the excess cable tie with my side cutters for a clean finish. After that, I’m preparing the clear plastic disc for the base. I’m giving it a quick wipe to make sure it’s clean and clear.
Fitting Base Cover and Securing Plate
With the wiring secured and the strain relief in place, I’m now cleaning that clear plastic disc to ensure a clear view. It’s going inside the lamp base housing. It’s there to provide an extra layer of protection and to cover up the internal components. I’m aligning the disc carefully so it sits flush and covers everything neatly. Next, I’m attaching the black circular disc to the very bottom of the lamp base. This is the final piece that seals everything up. I’m inserting the two screws into the bottom plate and tightening them evenly. This ensures the base is secure and doesn’t wobble. You don’t want a lopsided lamp.
Final Assembly Check and Functional Test
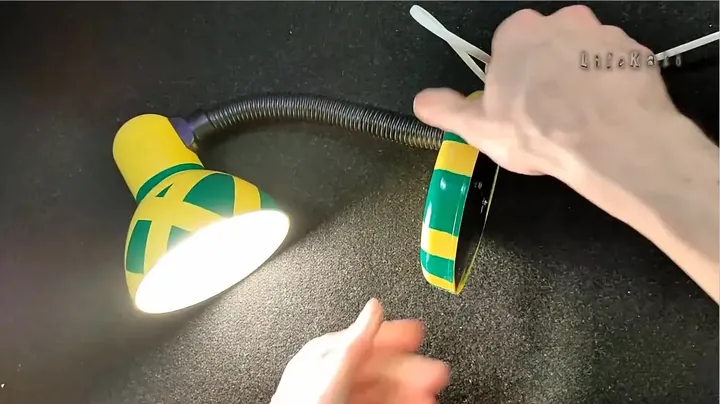
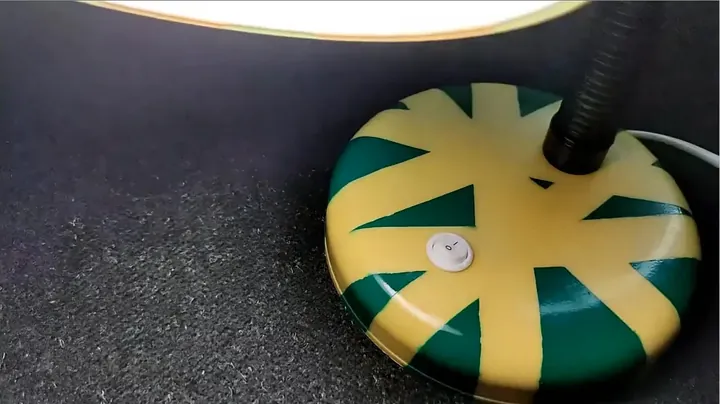
Almost done. I’m giving the lamp a final stability check on a flat, even surface. It needs to stand upright without any wobbling, no question. Now for the moment of truth: I’m plugging it in and turning on the lamp to test the circuit. A bright, steady light output is what I’m looking for. I’m also adjusting the power cord for a clean look, making sure it routes nicely. I’m checking the switch operation on the lamp base, ensuring it clicks firmly when toggled on and off. Finally, I’m inspecting the paint finish for any missed spots and confirming the lamp head stays in its desired position. This restoration guide is a keeper for future projects, I’d say. Proper lighting truly enhances any room.
⚠️ CAUTION: SAFETY WARNING!
Always unplug the lamp from the power outlet before starting any disassembly, repair, or maintenance work. Handle electrical wires with care, ensuring all connections are secure and properly insulated to prevent short circuits or electrical shock. If you’re unsure about any electrical steps, consult a qualified electrician.
Summary & Tips
Bottom line: this lamp restoration project is a solid win. It’s not just about getting a broken lamp working again; it’s about giving it a whole new look and making it truly your own. The electrical work is straightforward, and the painting process is a great way to personalize your gear. Just make sure all your connections are tight, and you’ll have a functional, stylish lamp that’ll last for years.
📋 FAQ
❓ Is it safe to rewire a lamp at home?
Rewiring is safe when proper precautions are observed. Utilize appropriate wire gauge, ensure secure crimped or soldered connections, and prevent exposed bare wires prior to power application. Verify all components thoroughly.
❓ How do I ensure the paint finish is durable?
Surface preparation is critical. Begin by cleaning the surface with a degreaser. Subsequently, apply thin, uniform coats of spray paint, allowing each layer to cure completely. This methodology enhances durability and prevents peeling.
❓ Can I use any type of spray paint for this project?
Specific paint types are required. Select a spray paint formulated for metal or plastic, depending on the lamp’s material composition. A premium enamel or all-purpose spray paint will yield optimal adhesion and longevity. Consult product labeling for specifications.
Disclaimer: I purchased all tools for this guide with my own money to ensure an unbiased review. This post contains affiliate links, meaning I earn a small commission if you make a purchase at no extra cost to you.
🛒 Useful Links & Products
Multi Function Disassembly Set
🛒 BUY ON ALIEXPRESSPower Electric Mini Drill
🛒 BUY ON ALIEXPRESS



Leave a Reply