A hair clipper that suddenly starts pulling instead of cutting usually doesn’t mean it’s broken. In many cases, the blade just lost its edge, even if it still looks fine.
A lot of people try the old sandpaper trick: place fine sandpaper on glass and rub the blade back and forth. It looks smart in short videos, but in reality, it often wastes time. After all that rubbing, the clipper may still grab hair, get hot, or sound rough.
I tested another method that takes less time and gave a noticeably better result — polishing paste. No complicated tools, no expensive equipment. Just a small amount of compound, a drop of oil, and a few minutes.
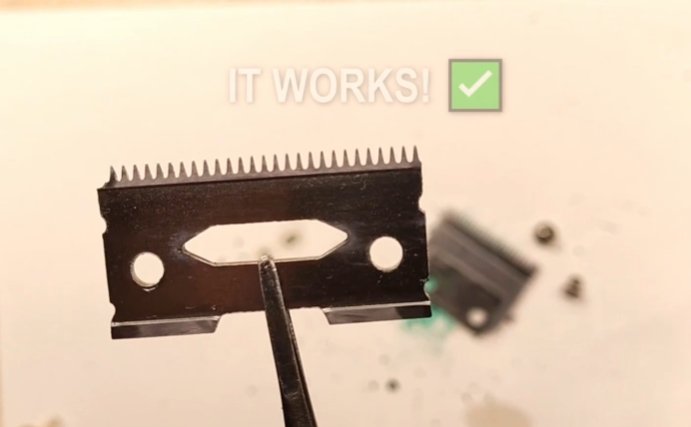
It worked on an old Wahl trimmer I almost threw away. The blade stopped pulling, ran quieter, and looked polished enough to reflect light.
The biggest surprise was how simple it was. The blade did not need aggressive grinding. It needed smoother contact where the two metal parts slide against each other.
Why Sandpaper Often Fails
Sandpaper seems like an easy fix, but it has several problems.
When clipper blades slide against sandpaper, the abrasive removes metal unevenly. Even fine grit can create tiny scratches that affect how the top and bottom blades move together. Since clipper blades rely on exact contact, those scratches can increase friction and make the motor struggle.
Common issues after sandpaper sharpening:
- Blade gets hot quickly
- Hair starts pulling
- Loud vibration appears
- Cutting becomes uneven
- Blade wears out faster
Many DIY videos recommend putting sandpaper on glass for a flat surface. The idea is good in theory, but most users press too hard or move the blade incorrectly, which rounds the edge instead of sharpening it.
Why Polishing Paste Works Better
Polishing paste is designed to smooth metal surfaces without removing too much material. It can refresh the cutting edge and improve contact between blade parts.
A green polishing compound is one of the most popular choices for metal tools because it creates a fine finish.
Benefits:
- Faster than sanding
- Safer for blade geometry
- Less risk of overheating
- Cleaner cutting edge
- Easy to use at home
The goal is not to grind away metal but to polish the edge so both blades slide smoothly.
What You Need
To sharpen clippers with polishing paste, prepare:
- Green polishing compound
- Soft cloth or cotton pad
- Small brush
- Clipper oil
- Screwdriver
- Tissue for cleaning
🛒 Useful tools:
- Green compound (widely sold online)
- Clipper oil
- Replacement ceramic blade if your steel blade is badly worn
Step-by-Step Method
1. Remove the Blade
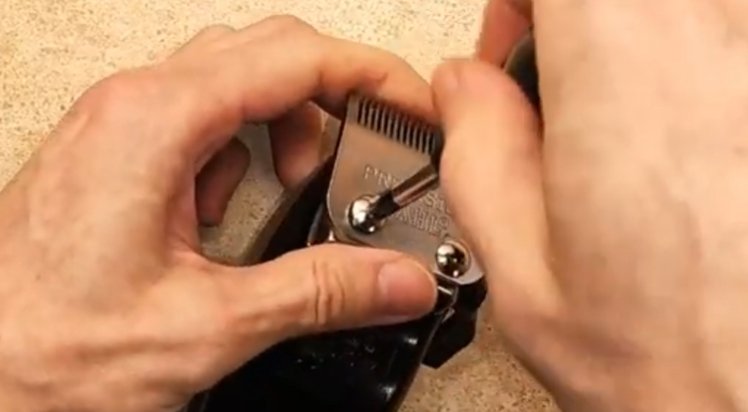
Turn off the clipper and unplug it if necessary. Remove the blade carefully using the correct screwdriver.
Place all screws in one container so nothing gets lost.
2. Apply Polishing Paste
Take a small amount of polishing paste and apply it directly to the blade contact area. Do not use too much.
A thin layer works best.
Spread it evenly across the flat side where the blades meet.
3. Add a Drop of Oil
This step makes a big difference.
Add one small drop of clipper oil. The oil reduces heat and helps the paste work more smoothly. Without oil, friction increases and polishing takes longer.
This also protects the metal surface.
4. Run the Blade Briefly
Reinstall the blade and turn the clipper on for a short time.
Let it run for about 1–2 minutes. During this time, the blade movement spreads the paste naturally and polishes the contact surfaces.
Do not run too long continuously. Stop and check the temperature.
5. Clean Everything
Remove the blade again and wipe away all residue.
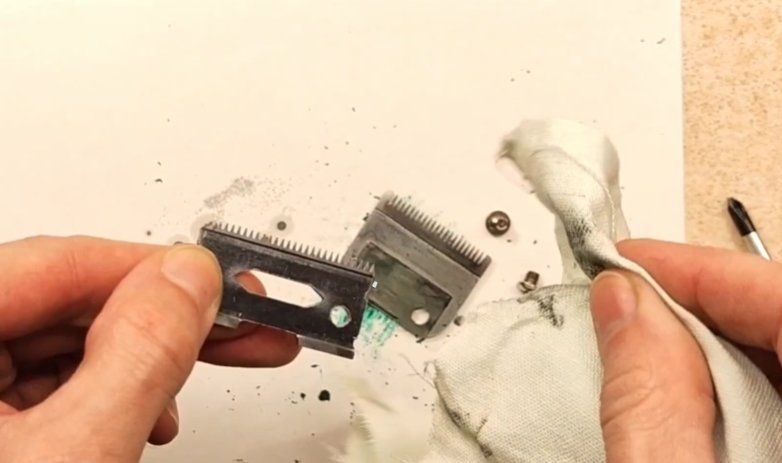
Use a brush to remove leftover paste from between the teeth. Clean carefully because any remaining compound can affect performance.
The surface should look smooth, often with a mirror-like shine.
6. Oil and Reassemble
Apply fresh clipper oil after cleaning. Reassemble the clipper and test it on hair.
Most users notice:
- smoother cutting
- less pulling
- quieter sound
- less heating
Can This Fix All Clippers?
This method works well for lightly dull blades. It helps if your clipper:
- pulls hair
- cuts slower than before
- feels rough
- makes unusual sound
It will not fully restore:
- chipped teeth
- bent blade parts
- broken drive pieces
- extremely worn blades
In those cases, replacement is better.
Steel Blade vs Ceramic Blade
Many users upgrade to ceramic blades after sharpening. Ceramic blades stay cooler and often stay sharp longer.
Advantages of ceramic:

- less heat
- quieter operation
- better for frequent cutting
- longer edge retention
However, steel blades are usually stronger if dropped.
Common Mistakes
Avoid these mistakes:
Using too much paste
More paste does not sharpen faster. It only creates extra cleanup.
No oil
Dry polishing increases heat and can damage surfaces.
Pressing hard
Heavy pressure reduces accuracy.
Skipping cleaning
Any leftover compound may wear the blade over time.
How Often Should You Sharpen?
For home use, every few months is enough. If you cut hair often, check the blade when:
- cutting becomes rough
- hair pulls
- sound changes
- blade heats quickly
Regular oiling extends blade life much more than frequent sharpening.
Before buying new clippers, try restoring the old blade. Many trimmers work poorly simply because the contact surface is dirty or dull.
Polishing paste can save time, money, and often brings an old clipper back to smooth cutting in minutes.
If you maintain your clipper regularly, even inexpensive models can last for years.
👉 More DIY repair ideas and practical fixes can be found on LifeKaki.
Sub to @LifeKaki for more DIY madness.
More from the workshop:
- Don’t trash that plastic bottle! (See why)
- Tested: Is this Bicycle Light worth the money?
- Lost your Grinder Key? No problem.
Discussion:
Have you ever used graphite to fix electronics? Let us know in the comments below! Your experience helps our community learn safely.


Leave a Reply