It’s funny how to many things we throw away without really looking at them. But if you stop for a moment and actually take it apart, you’ll find that the little plastic ball inside is almost the perfect shape for a tiny Christmas ornament.
A roll-on deodorant bottle, for instance you finish it you toss it, end of story. Smooth, round, lightweight… Basically ready to be decorated.
This small project takes very little time, and for some reason it feels relaxing, like cleaning your desk or folding paper. And you get something cute at the end.
What You Should Gather First
No specialty tools. No expensive craft kits. Just whatever is probably lying around:
- empty roll-on bottle (the ball is what we need)
- warm water and a drop of dish soap
- a bit of rubbing alcohol
- tweezers or a tiny flat screwdriver
- a needle or something sharp to make a hole
- hot glue or any thick craft glue
- small paints (acrylics work best)
- a brush you don’t mind ruining
- glitter, beads, ribbons, or anything festive
- clear varnish or Mod Podge
- some string, wire, or a spare ornament hook
Put it all on the table so you don’t have to search mid-process.
Step 1. Open the Bottle and Free the Ball

Preparing the Ball Remove the rollerball carefully from the deodorant bottle. Clean all parts thoroughly with soap and warm water. Use rubbing alcohol to remove label adhesive. Dry completely.
Step 2. Cutting the Foam Hanging Strip
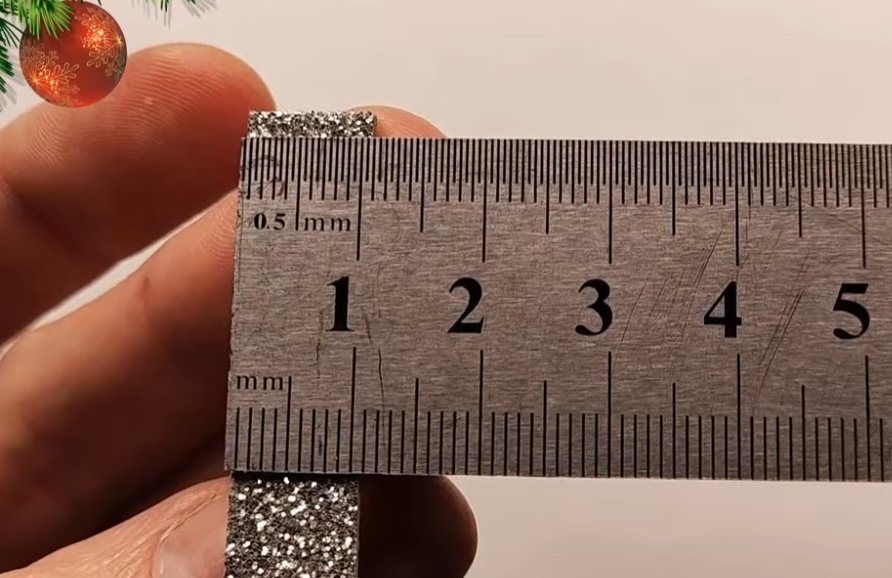
Cutting the Foam Hanging Strip If using foam or ribbon for suspension, cut a small strip and prepare a loop long enough to hang from a branch. Some crafters prefer using wire or a jump ring for a more secure attachment.
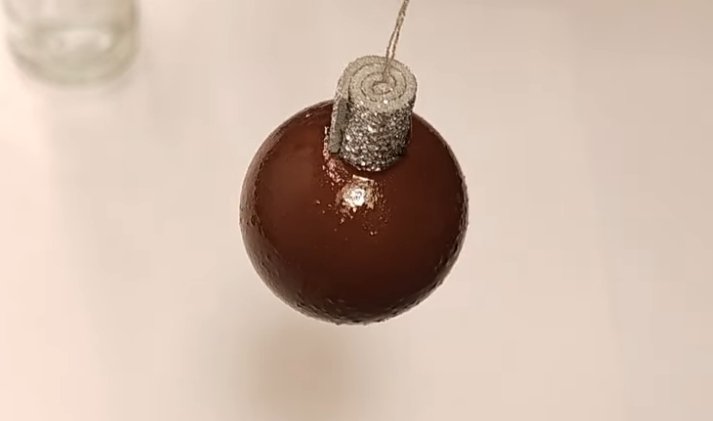
Cut a 5×1 cm foam sheet strip, wrap it with golden thread, roll it tightly and fix with hot glue. Then attach the finished piece to a deodorant ball.
Step 3. Creating & Gluing the Hanging
Creating & Gluing the Hanging Loop Drill or melt a small hole at the top of the rollerball. Insert the loop and glue it securely using hot glue or epoxy. Let cure. Reinforce with a second layer of glue for strength.
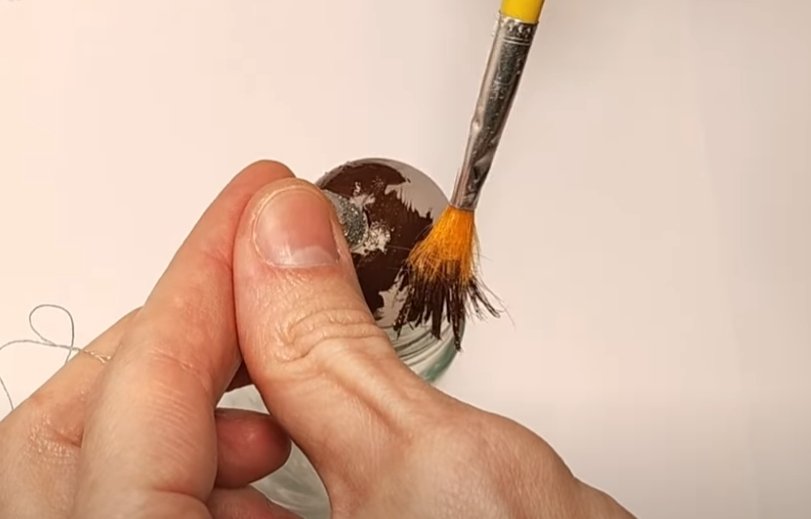
Step 4. Painting with Acrylics
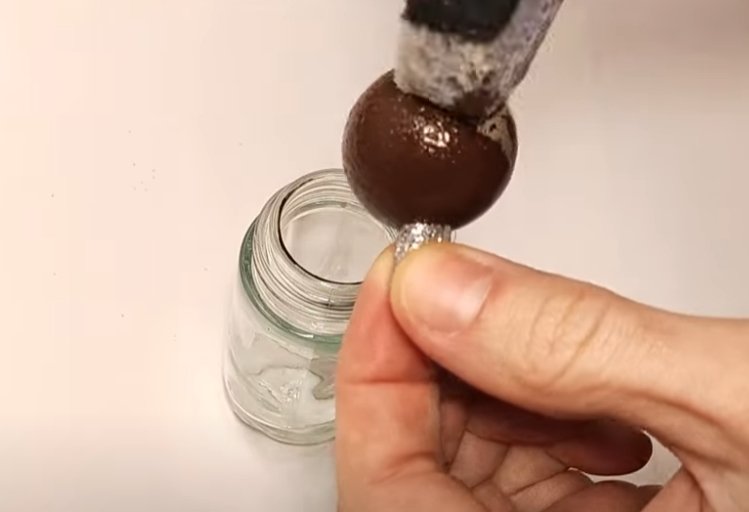
Paint the ball with your choice of acrylic color. Metallic or glitter-infused paint adds a festive touch. Allow the first coat to dry before applying a second.
Step 5. Drying Time & Applying Final Touches
Drying Time & Applying Final Touches Let the paint dry fully. Add decorative elements such as glitter, sequins, or ribbon details. Optionally seal the entire ornament with clear Mod Podge or acrylic spray for durability.
Step 6. Paint the Base Color
Acrylics give the smoothest coat. Two thin layers look better than one thick, rushed one. Metallic gold or silver instantly makes the ornament look store-bought, but any color works if you decorate well later.
Let it dry completely before touching it again.
Step 7. Add Decorations
This is where your imagination can go in random directions. A few easy ideas:
- coat the top in glue and dip it into glitter
- glue on little beads or rhinestones
- paint tiny stars or swirls
- wrap a decorative ribbon around the center
- use paint pens for precise patterns
- make a small “face” if you want a cartoonish look
No rules here – messy, neat, detailed, minimalistic, all of it works.
Step 8. Seal the Ornament
A thin coat of Mod Podge or a clear spray keeps the paint from scratching. It also adds a light shine that makes colors pop under tree lights.
Step 9. Final Touches

Trim loose threads, add a bow if you feel like it, and decide if the original cap can be reused as a decorative stand or extra detail. Sometimes it fits under the ball perfectly and looks like a tiny base.
A Few Tips From Experience
- Let the paint cure overnight if you can.
- If the ball still feels too light, add a small metal washer inside before sealing.
- Store the ornament wrapped in soft paper; handcrafted pieces survive longer that way.
- These types of decorations are better indoors – weather can dull glue and paint.
A Small Thought to End With
There’s something oddly satisfying about turning an everyday item into something festive. It’s a reminder that most “trash” isn’t really trash unless we give up on it. An empty bottle suddenly becomes a small ornament that might stay in your holiday box for years.
Related Videos You Might Like:
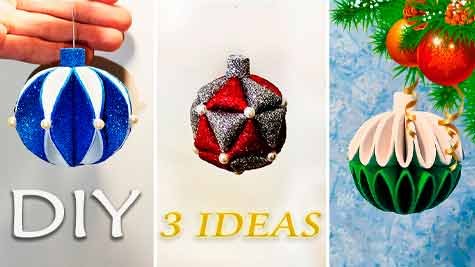
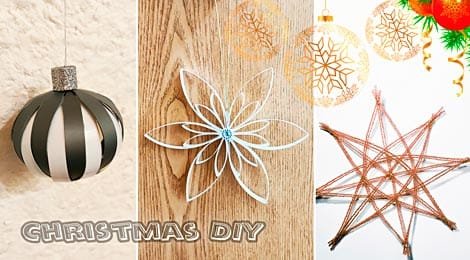
- Christmas decorations
- How to Make NEW YEAR’S TOY in 10 Minutes with a Plastic bottle!
- LED Bicycle Front Light with Type-C Rechargeable Battery – Complete Unboxing and Review
- How to Change the Circle on the Grinder Without a Key – Easy and Safe Methods
Let’s Hear from You!
Did you know about this method? Drop your experience or questions in the comments! Your feedback helps and inspires others.


Leave a Reply