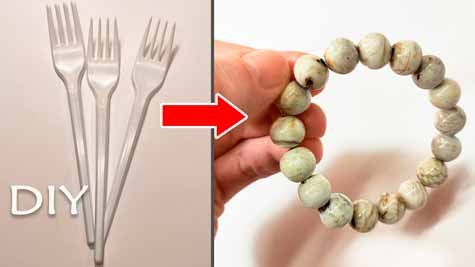
Craft Beauty from Waste. Sometimes, the most beautiful things come from the simplest materials. A few disposable plastic forks, a bit of heat, and your creativity can turn what would be trash into a beautiful bracelet you will be proud to wear or gift. This is an easy and fun project for anyone who enjoys making things with their hands.
This project is a great way to recycle and make something beautiful at the same time. Try it today and see how waste can turn into art!
Turning everyday plastic waste into a piece of wearable art is both rewarding and practical. One of the easiest and most creative upcycling projects you can try at home is making a bracelet from disposable plastic forks. This project requires minimal tools, little cost, and yields a unique accessory that looks far more elegant than its humble origins. Not only does this craft reduce waste, but it also gives you a chance to experiment with color, texture, and finishing techniques to create beads that resemble polished stones or glass. The following guide explains the full process step by step, offers safety tips, and suggests variations so you can make bracelets that fit your style or create items to sell.
What You Will Need
- Clean disposable plastic forks
- Pliers or strong scissors
- Heat source (heat gun or candle)
- Fine sandpaper or nail file
- Elastic cord or jewelry wire and clasp
- Gloves and safety glasses
Step-by-Step Instructions
Step 1 – Prepare the forks
Wash and dry the plastic forks. Cut off the prongs using scissors or pliers, leaving only the handle and base. These will be your bead material.
Step 2 – Cut into small pieces
Slice the handles into small rectangles, about 1–1.5 cm long. Try to keep the pieces roughly the same size for uniform beads.
Step 3 – Heat the plastic
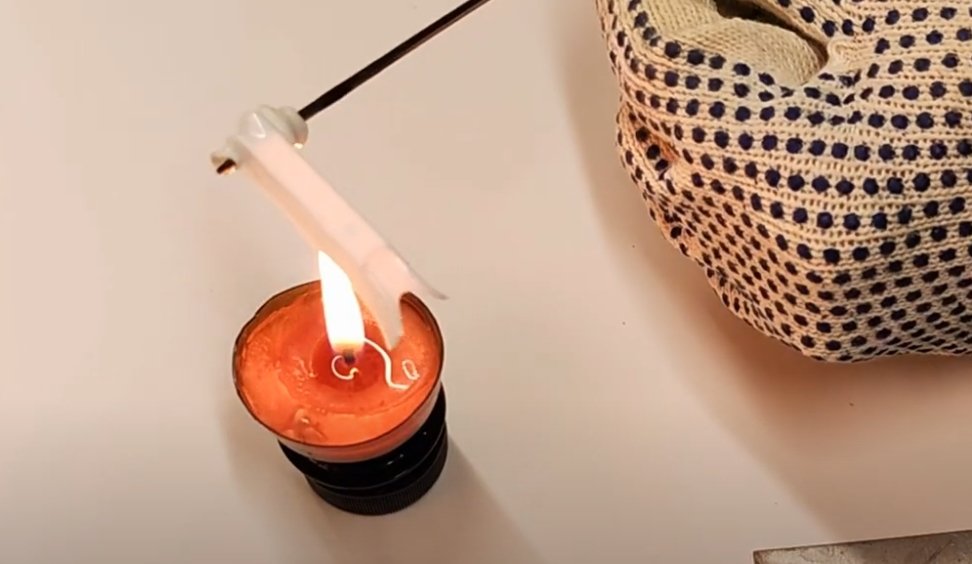
Work in a well-ventilated area. Heat one piece at a time using a heat gun or carefully over a candle flame. The plastic should soften but not burn.
Safety notes. Always work in a well-ventilated area when heating plastic. Avoid inhaling fumes and never melt large quantities of plastic at once. Keep children supervised and away from heat sources. Use heat-resistant gloves and eye protection where appropriate.
Step 4 – Shape the bead
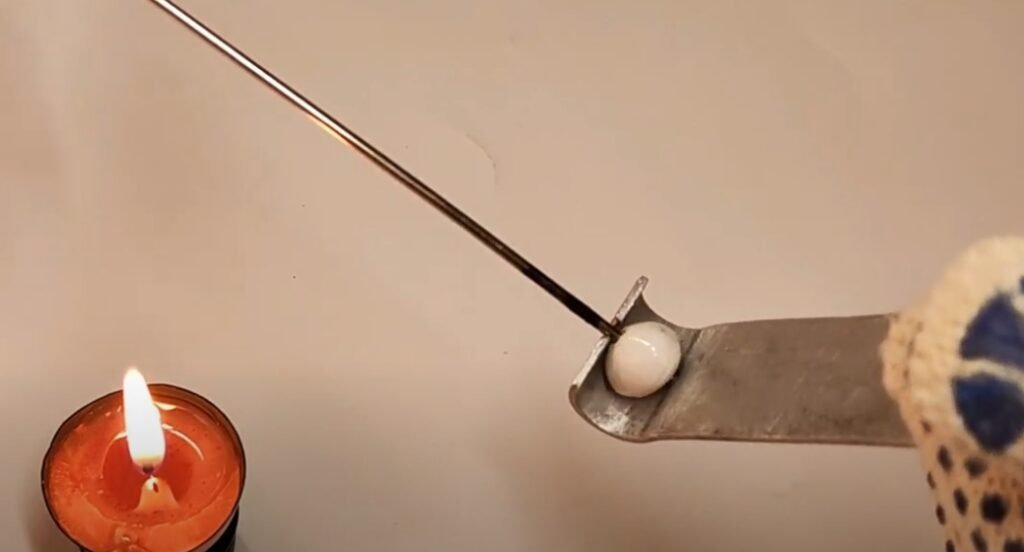
Once soft, smooth and polish.
You can leave them as they are or paint them for extra style.
Step 5 – Paint and seal (optional)
Use acrylic paint or nail polish to add color. For a marble look, blend two or more colors. Seal with clear varnish or polish for shine and durability.
Step 6 – String the bracelet
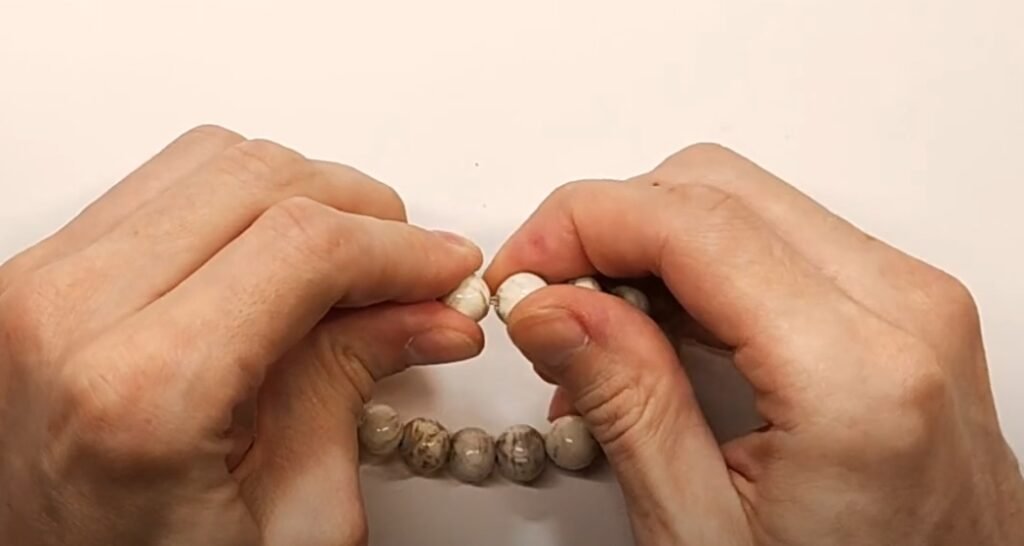
Thread the beads onto an elastic cord or wire. Tie a secure knot or attach a clasp. For extra safety, add a drop of glue to the knot.
Step 7 – Wear and enjoy
Your unique bracelet is ready. Wear it, gift it, or make more for friends and family. Every piece will be different and special.
Tips and Ideas
- Mix plastic from forks of different colors for fun effects.
- Use transparent plastic for a glass-like look.
- Add small charms or metal spacers between beads.
This bracelet project is ideal for solo craft nights, group workshops, school eco-activities, or creating small runs for sale at craft fairs. The low cost and high customizability mean you can make dozens of unique bracelets from a relatively small number of forks. Every bracelet tells a story of transformation from single-use item to cherished accessory, and every sale or gift spreads awareness about creative recycling.
Watch more creative DIY ideas on LifeKaki YouTube channel
Follow us here:
Facebook: https://www.facebook.com/LifeKaki/
Twitter: https://twitter.com/LifeKaki_
Telegram: https://t.me/lifekaki
Linktr: https://linktr.ee/lifekaki
Moj: https://mojapp.in/@life_kaki
Tumblr: https://www.tumblr.com/blog/lifekaki
Tiktok: https://www.tiktok.com/@lifekaki_diy
Threads: https://www.threads.com/@lifekaki_diy
Instagram: https://www.instagram.com/lifekaki_diy/
Related Videos You Might Like:
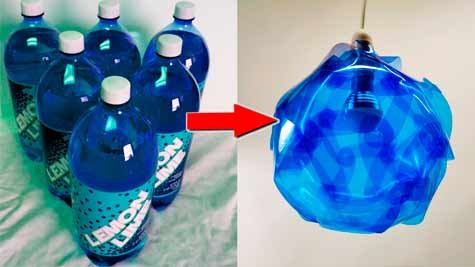
- Lamp made from glass jar and stones from the sea
- DIY Lamp from a Crystal Flower Vase – Festive Decoration Idea
- How to tie a shoelace with a metal ring
Let’s Hear from You!
Did you know about this method? Drop your experience or questions in the comments! Your feedback helps and inspires others.


Leave a Reply