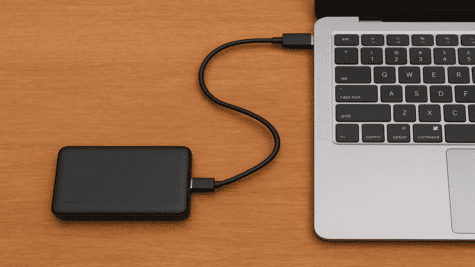
When a laptop runs out of battery at the most crucial moment, and there’s no outlet nearby, portable power comes to the rescue – a power bank. However, most models on the market are designed only for smartphones and tablets, while a laptop needs higher voltage and power.
That’s why many users choose an alternative – to make a laptop power bank themselves. This allows them to customize it for specific needs, save money, and better understand how power works
In this article, we will look at how to create a reliable and safe laptop power bank at home, what components are needed, how to avoid common mistakes, and what you should know about safety.
Main content: step-by-step instructions
Step 1. Determining Laptop Parameters
Start with the main thing – determine what voltage (V) and current (A) your laptop consumes. This data is indicated on the original charger or in the model’s technical specifications.
- Most laptops operate at 19 V and consume from 2 A to 6 A.
- For the power bank to work correctly, the output voltage must match these indicators.
Step 2. Selecting Batteries
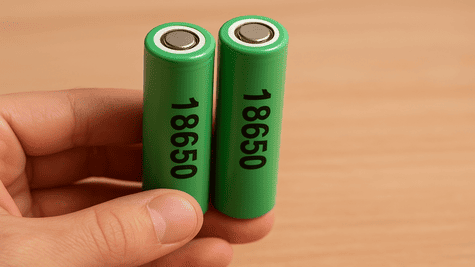
For creating a power bank, lithium-ion (Li-Ion) or lithium-polymer (Li-Po) cells are most often used. The most popular option is cylindrical 18650 batteries.
Advantages: high energy density, availability, durability.
Calculate the number of cells using the formula:
Power bank capacity (Wh) = Number of batteries × Capacity (Ah) × Voltage (V)
For a medium-power laptop (65 W), at least 6–8 18650 cells of 2500–3000 mAh each will be needed.
Step 3. Charge Controller (BMS)
BMS is a Battery Management System, a module that manages the charging and discharging of batteries, preventing overheating, short circuits, and overcurrent.
A BMS for 4–6 cells, designed for a current of at least 10 A, will be suitable. Without this component, the system will be dangerous.
Step 4. Voltage Converter (DC-DC Boost Converter)
To ensure the laptop receives a stable 19 V, a step-up voltage converter must be installed. It raises the voltage from 3.7 V (one cell) to the required level.
The converter must support an output power of at least 90 W (for a standard laptop).
Step 5. Casing and Cooling
The power bank’s casing must be heat-resistant and insulated. Use plastic or aluminum cases with ventilation holes. Install a small fan or passive heatsink for cooling under load.
Step 6. Connecting the Laptop Connector
Each manufacturer has its own plug – ensure that the polarity matches the original. For versatility, you can install interchangeable tips, similar to those used in commercial adapters.
Step 7. Verification and Testing
Before first use:
- Check the output voltage with a multimeter – it must be stable.
- Perform a short test with a lamp or other load.
- Only then connect the laptop.
Safety and Certification
DIY power banks have an obvious advantage – flexibility, but also increased risks.
To avoid dangerous situations:
- Use original power cells (Panasonic, LG, Samsung).
- Avoid unmarked batteries or those with different capacities.
- Do not allow overcharging beyond 4.2 V and discharging below 3 V.
- Store the device in a cool, dry place.
- Never leave it connected unattended.
Additional Tips
- For travel, you can add a charge indicator or USB ports for smartphones.
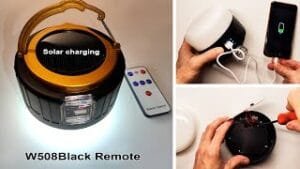
- If you often use your laptop off-grid, consider a solar panel as an additional power source.
- For greater capacity, batteries are connected in parallel; for higher voltage, they are connected in series.
- Avoid cheap components — the safety of your laptop depends on it.
- If you have no soldering experience, consult a specialist, as a mistake can cost not only the device but also your health.
Useful Resources
(These resources will help you find connectors, cables, or ready-made modules for your project.)
Creating a laptop power bank yourself is entirely feasible. It’s not just a technical challenge but also a way to better understand the operation of battery systems. The main thing is to adhere to technical parameters, safety rules, and not to skimp on quality parts. Such a device will become a reliable assistant on business trips, travels, or during emergency power outages.
Follow us here:
Lifekaki Channel: https://www.youtube.com/lifekaki
Facebook: https://www.facebook.com/LifeKaki/
Twitter: https://twitter.com/LifeKaki_
Telegram: https://t.me/lifekaki
Tiktok: https://www.tiktok.com/@lifekaki_diy
Instagram: https://www.instagram.com/lifekaki_diy/
Related videos you might like:
- Smart multi-color Christmas garland with app control – review and impressions
- How to convert a fluorescent lamp to LED — step-by-step energy-saving guide
- LED bicycle headlight with battery: review and test
- How to change an angle grinder disc without a key: a complete safe guide for craftsmen
- How to sharpen a Panasonic ES-SL41-S520 foil shaver
- How clean can your shaver be with this trick?
Let’s hear your thoughts! Did you know about this? Share your experience or leave questions in the comments! Your feedback helps and inspires others.


Leave a Reply